Menu
  • IanAndWendy.com
    • WineTastingSonomaCounty.com
    • WeTravelWithKids.com
    • Close
  • Map
  • Countries
    • Caribbean
      • Anguilla
      • Antigua
      • Aruba
      • Bahamas
      • Curacao
      • Dominica
      • Easter Island
      • Martinique
      • Puerto Rico
      • St. Lucia
      • St. Martin
    • Americas
      • Mexico
      • USA
      • Costa Rica
    • Eastern Europe
      • Austria
      • Czech Republic
      • Estonia
      • Latvia
      • Lithuania
      • Poland
      • Slovakia
      • Slovenia
    • Western Europe
      • Belgium
      • Denmark
      • France
      • Germany
      • Greece
      • Holland
      • Hungary
      • Iceland
      • Italy
      • Liechtenstein
      • Luxembourg
      • Norway
      • Portugal
      • Spain
      • Switzerland
      • Turkey
      • Vatican City
    • Asia
      • Brunei
      • Cambodia
      • China
      • Vietnam
      • India
      • Korea
      • Malaysia
      • Maldives
      • Singapore
      • Thailand
      • Turkey
    • Middle East
      • Egypt
      • Israel
      • Jordan
      • Oman
      • UAE
    • Africa
      • Botswana
      • Namibia
      • Egypt
      • Morocco
      • Tunisia
      • Zimbabwe
    • Pacific
      • Cook Islands
      • Easter Island
      • Tahiti
      • New Zealand
    • Close
  • Travel Tips
  • amazon
  • About Us

Felt (Flannel) Boards – Cheap, Easy DIY Travel Games That Are Great for Travel with Kids

May 26, 2012
by Wendy
cheap travel toys, make travel with kids easier, travel toys, travel with children, Travel With Toddler
1 Comment

When searching for new travel games to keep our two young children busy, we are frequently greeted with the advice that we should bring new toys. In fact, we’ve given out that advice ourselves – more than once! But new toys = more money and since travel is already usually an expensive proposition, this just adds insult to injury.

But what if I told you there was a super lightweight toy that cost next to nothing to make, was super easy to boot and was {drum roll, please!} washable?  Um, yeah, but I’m not crafty we hear you protest. That’s okay – we’re not either! Flannel boards (sometimes called felt boards) have got to be the easiest thing in the world to make and require basically no crafting skills. If you can iron, cut and glue, you’re golden! So let’s get started.

You will need:
  • Some flannel (available by the yard at Walmart, or a fabric store, or you can use an old flannel sheet/pillow case)
  • A child lap-sized piece of cardboard (this time it was the side of a San Pellegrini box)
  • A glue gun, or duct tape
  • Some images (These can be anything your child is into. Disney.com has a ton of great images that will work and any Google image search will turn up lots of great options for basically any topic).
  • Felt (available at Walmart or Michael's for like 25 cents a sheet)
  • Iron on transfers (having used several kinds, we highly recommend these Avery ones - they're much more durable and more "real" looking).


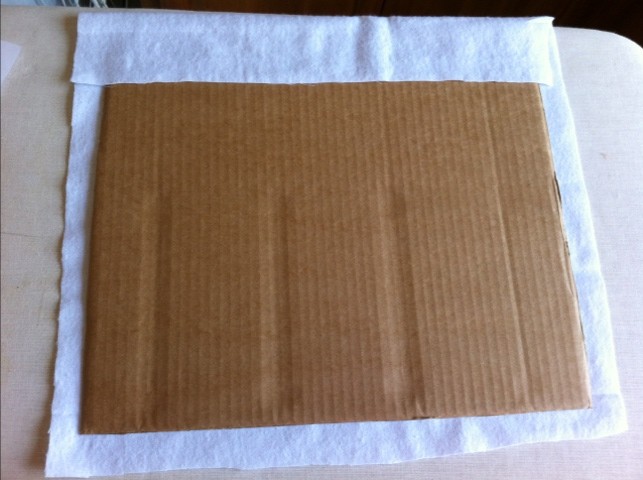
Iron your flannel if it’s wrinkled.  Cut out a piece of cardboard that suits your child’s lap.  Then, lay the cardboard on your flannel and cut around it, leaving about an extra inch or two all around.  You don’t need to measure and straight-ish lines are more than good enough.  I decided to add a felt pocket on the back to hold the pieces.  So I wrapped the top further down to make sure that the whole thing would be covered when I added the pocket.  It’s totally up to you if you want to add that step (or just use a gallon sized Ziploc bag to store your sets in).  Then, just wrap the flannel over the cardboard and hot glue (or duct tape) down.  Voila!  You have now created a flannel board.

Getting ready to wrap the flannel around the cardboard.

To add a pocket, use your glue gun to hot glue around the edges of a piece of felt, leaving enough slack that it forms a pocket like so:
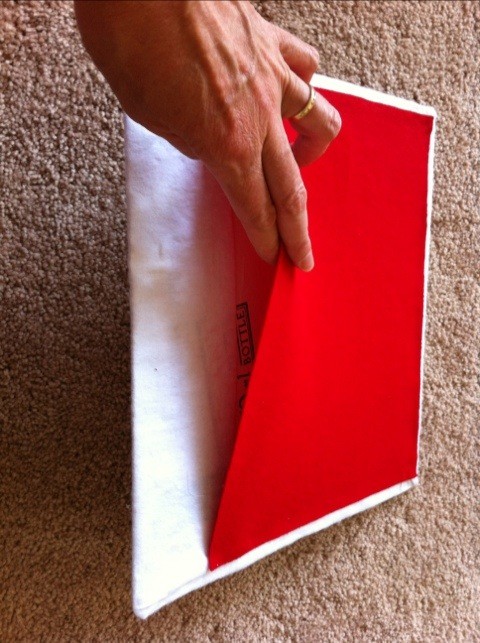
Felt pocket on the back of the flannel board to hold the pieces.
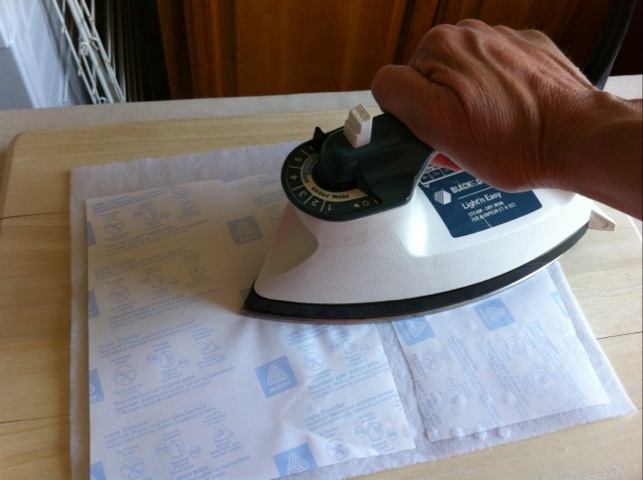
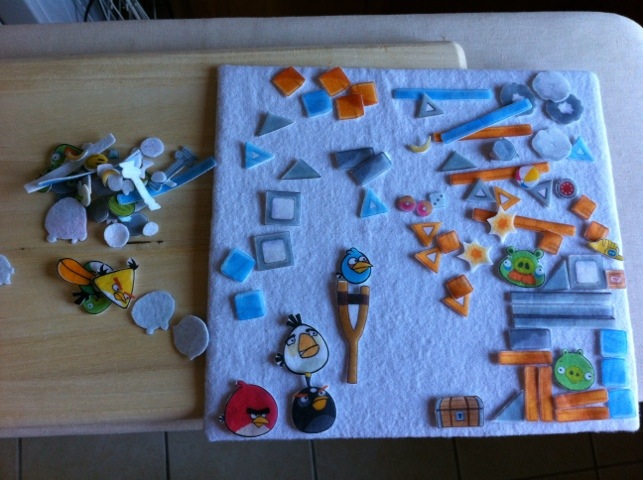
Next, you’ll need some pieces to play with. Choose some images your child will enjoy. Thanks to the internet, there’s pretty much no limit to what you could go with. We’ve made sets of Angry Birds, Strawberry Shortcake, Cars, Hello Kitty, Care Bears and more.  (If you check out how much these felt board sets would cost you to buy, we think you’ll see why we’ve been motivated to make them ourselves).  Grab a bunch of kitchen images and your child can spend that next flight being the new Iron Chef. Have a car enthusiast? There’s no shortage. Budding princess? There’s loads of images that would work. Print your chosen images onto the iron-on-transfer sheets following the instructions.  Iron them onto the felt. (We’ve used the cotton setting just like it said in the instructions despite the felt being polyester. It’s never melted/singed). The transfers take a little patience, but if you follow the instructions they should work out great.  One thing we do differently is to ignore the advice about not using an ironing board.  Heck – it’s our ironing board’s only chance of being used!  We find it a convenient height, so we just use a wooden cutting board so that the surface you push against is good and hard.  It’s always worked well.  Make sure you push down and don’t slide the iron from side to side – doing that can smear the image.

Make sure to press straight down and not slide from side to side like you would if your were ironing.  Assuming you iron... ;)
Make sure to press straight down and not slide from side to side like you would if your were ironing. Assuming you iron... 😉
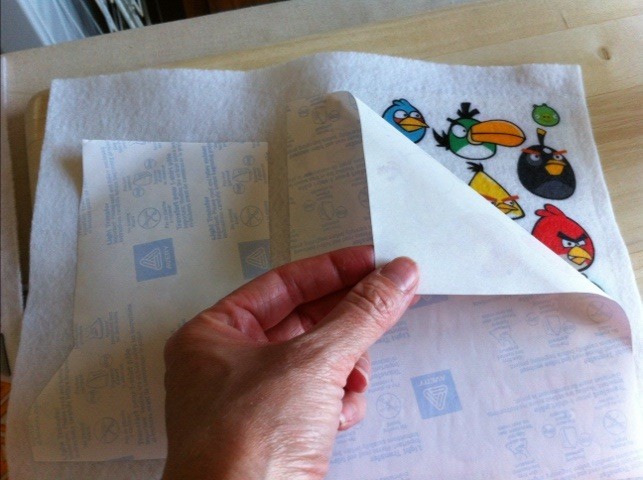
When the felt has cooled, slooowly peel back the paper backing.  If it won’t come off easily, or if the image still seems to be stuck to the backing – iron some more.

Make sure to press straight down and not slide from side to side like you would if your were ironing.  Assuming you iron... ;)
Make sure to press straight down and not slide from side to side like you would if your were ironing. Assuming you iron... 😉
Then, just cut out your pieces and you’re ready to play!  So, there you have it. A super cheap, lightweight, easy to make at home endless supply of new toys that will match your child’s changing passions and is washable to boot!

All cut out and ready to be played with.
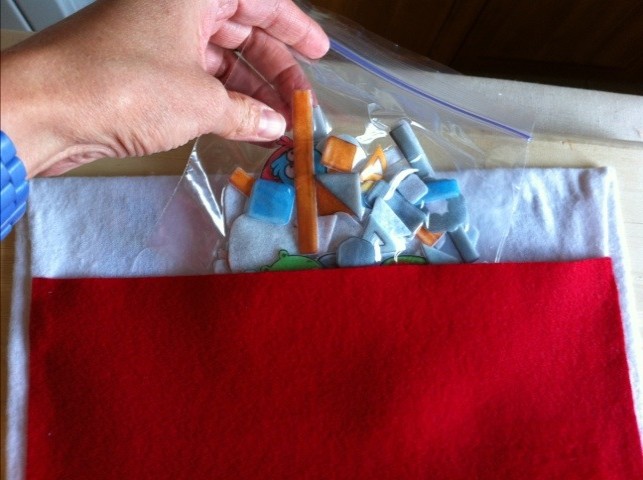
We keep ours, er, our children’s stored in zip loc bags, but then…we keep everything stored in zip loc bags!  They do really keep the pieces organized and contained easily and the pocket gives you an easy place to keep different sets.

Pieces are easy to store in sandwich sized ziploc bags.
Made some of these yourself? We’d love to see your creations!  Happy travels!


About the Author
Social Share
  • google-share
One Comment
  1. TravelDesigned July 10, 2012 at 8:49 am

    Hi Wendy!
    What a cool idea!!! I suggest a mini upgrade — add a piece of velcro to your storage area so your fav pieces don’t slip out and get lost.

    [Reply]

Leave a Reply Cancel reply

captcha *

Click to cancel reply

Recent Posts

How to spoil yourself silly on a beach vacation
Nov 06, 2015
Old, almost free tech bringing traveling families together
Oct 15, 2015
Losing our wheels in Munich
Oct 09, 2015
A disgusting car seat awaits you in Munich!
Sep 30, 2015
Alphaberry by B-Toys - An electronic singing toy we love to travel with!
Sep 28, 2015

Slideshows

(see all 0 slideshows)

Videos

Recent Posts

  • How to spoil yourself silly on a beach vacation
  • Old, almost free tech bringing traveling families together
  • Losing our wheels in Munich
  • A disgusting car seat awaits you in Munich!
  • Alphaberry by B-Toys – An electronic singing toy we love to travel with!
  • Fabulous indoor – and outdoor – playground in Siauliai, Lithuania